As a freelancing industrial designer, time is often of great importance when rendering out designs. Here are few sets of simple tips and tricks given by Pritish Halder, which you can utilize to speed up your render process without losing any quality. , but many of the things suggested in this post can be applied to any stage of the sketching process.
Elevation of the deign
1. UI Placement vs. Hand Travel
An often-overlooked aspect of speeding up your sketch process is the UI placement. If you are right-handed, so naturally your hand will be placed to the right of your tablet. Placing all your utilities on the right side of the screen reduces the need for you to reach across the canvas when you want to access your tool bars. This might sound like a minor improvement to your workflow, but if you think about how many times you change tools this will have a huge impact on the overall render time by significantly reducing the hand travel across the screen.
2. Be Proactive with Layer Structuring
One of the huge benefits of sketching digitally is the freedom to change things deep in the rendering process. Making these changes as easy to implement as possible is key to making a quick, great-looking render.
3. Envision the Final Image
Another big benefit of sketching digitally is that you can do much of the composition work at the end of the render — in contrast to sketching on a paper were choosing your composition before starting is preferred. The key is to have the different views of the product separate from each other, then you can move them around freely to create that perfect composition. That being said, it’s good to have a rough layout in advance.
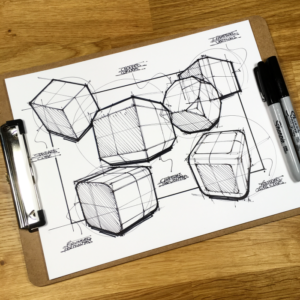
4. Starting Off Right (or left)
The first thing to normally sketch once you have a general idea of the design are the different views — side view, front view, top view, etc. This gives a greater feel for the final design, and it’s much easier to go into perspective view once you have every detail down. That’s why you often find one of these views in my compositions.

Industrial product design sketch
5. Saving Time with Symmetry
A lot of products are somewhat symmetrical. The symmetry tool can save you a lot of time when sketching these kinds of products. It’s not ideal for doing perspective sketches, but for those side and front views, it’s perfect. You can make the sketch look less artificial by adding unique details on one side after you’ve created the symmetrical lines.
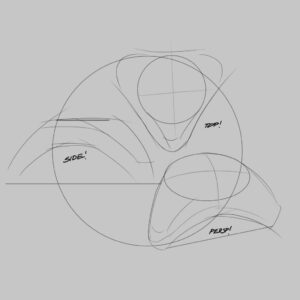
6. Perspective Is Hard (Make It Easier)
One of the most time-consuming aspects of rendering might be perspective. Having a perspective view of your product is often the most persuasive method of displaying your design as it gives the viewer a lot of information about the product, and will come off as impressive if done right. However, if the perspective is clearly wrong, it can leave the viewer questioning the design. There are ways of creating close to a perfect perspective without having to pull your hair out in the process.
7. Another Perspective Cheat
Another way of getting near perfect perspective is to create a simple 3D object (if you have access to a 3D program that is), and use it as an underlay. You should be careful using this method since it can have an opposite effect if you start adding to much detail to the 3D model as this can be very time consuming. It’s often faster to just add the details in the sketch. Just make simple shapes like cubes and cylinders to quickly get into the rendering process.

3D fundamental shapes
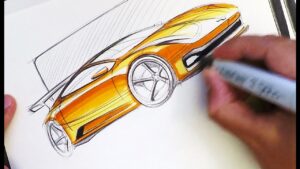
8.Become a Surgeon with the Stroke
If your design has a lot of curvature, getting those curves to really live up to their potential can be tough. In the example below you can see a toaster render, and although it’s based on a rectangle shape, it’s hard to find any straight lines in the design. To accomplish the clean line work use the Steady Stroke feature. Using this can save you from a lot of hassle and redrawn lines when working on those curves.
3D color shading effect
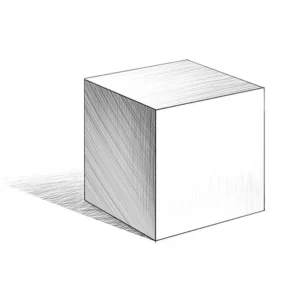
9. The Magic Wand
When it’s time for shading, there are few tools to value above the selection tools. Using color fields and the magic wand you can easily isolate the specific area you want to shade. This saves you the trouble of staying inside of the lines or using the eraser like a mad man.
In the example you can see a simple cube design. By using the magic wand to select each side separately and start shading the sketch with dark shadows and white highlight.
3D cube object
10. Creating the Perfect Ellipse
If you’ve ever tried to draw a perfect ellipse with a regular pen and paper you’ve probably experienced true struggle and desperation. Thankfully, the Ellipse tool in Sketchbook makes this process a walk in the park.
Reference
https://blogs.autodesk.com/sketchbookpro/10-tips-for-product-design-sketching-with-filip-chaeder/


Hello and thank you for your inquiry! Our firm does handle ABIM cases. Please call (407) 331-6620 for more information or to speak to our client intake specialist to schedule a consultation.